To get a good visual for graphs, we made a graph out of all of our shoes! Students sat in a circle and we decided how we would sort our shoes. They came up with three categories: shoes with Velcro, shoes with laces, and flip flops. Each person took a turn placing his or her shoe in the correct area on our graph.

Next, we counted how many shoes were in each group. We had 5 shoes with Velcro, 15 shoes with laces, and 1 flip flop. As a class, we discussed how this graph is helpful if we want to know right away which group had more or less shoes. We figured how how many more shoes were in the laces group compared to the Velcro and flip flops and how many shoes we had when we added them all together.

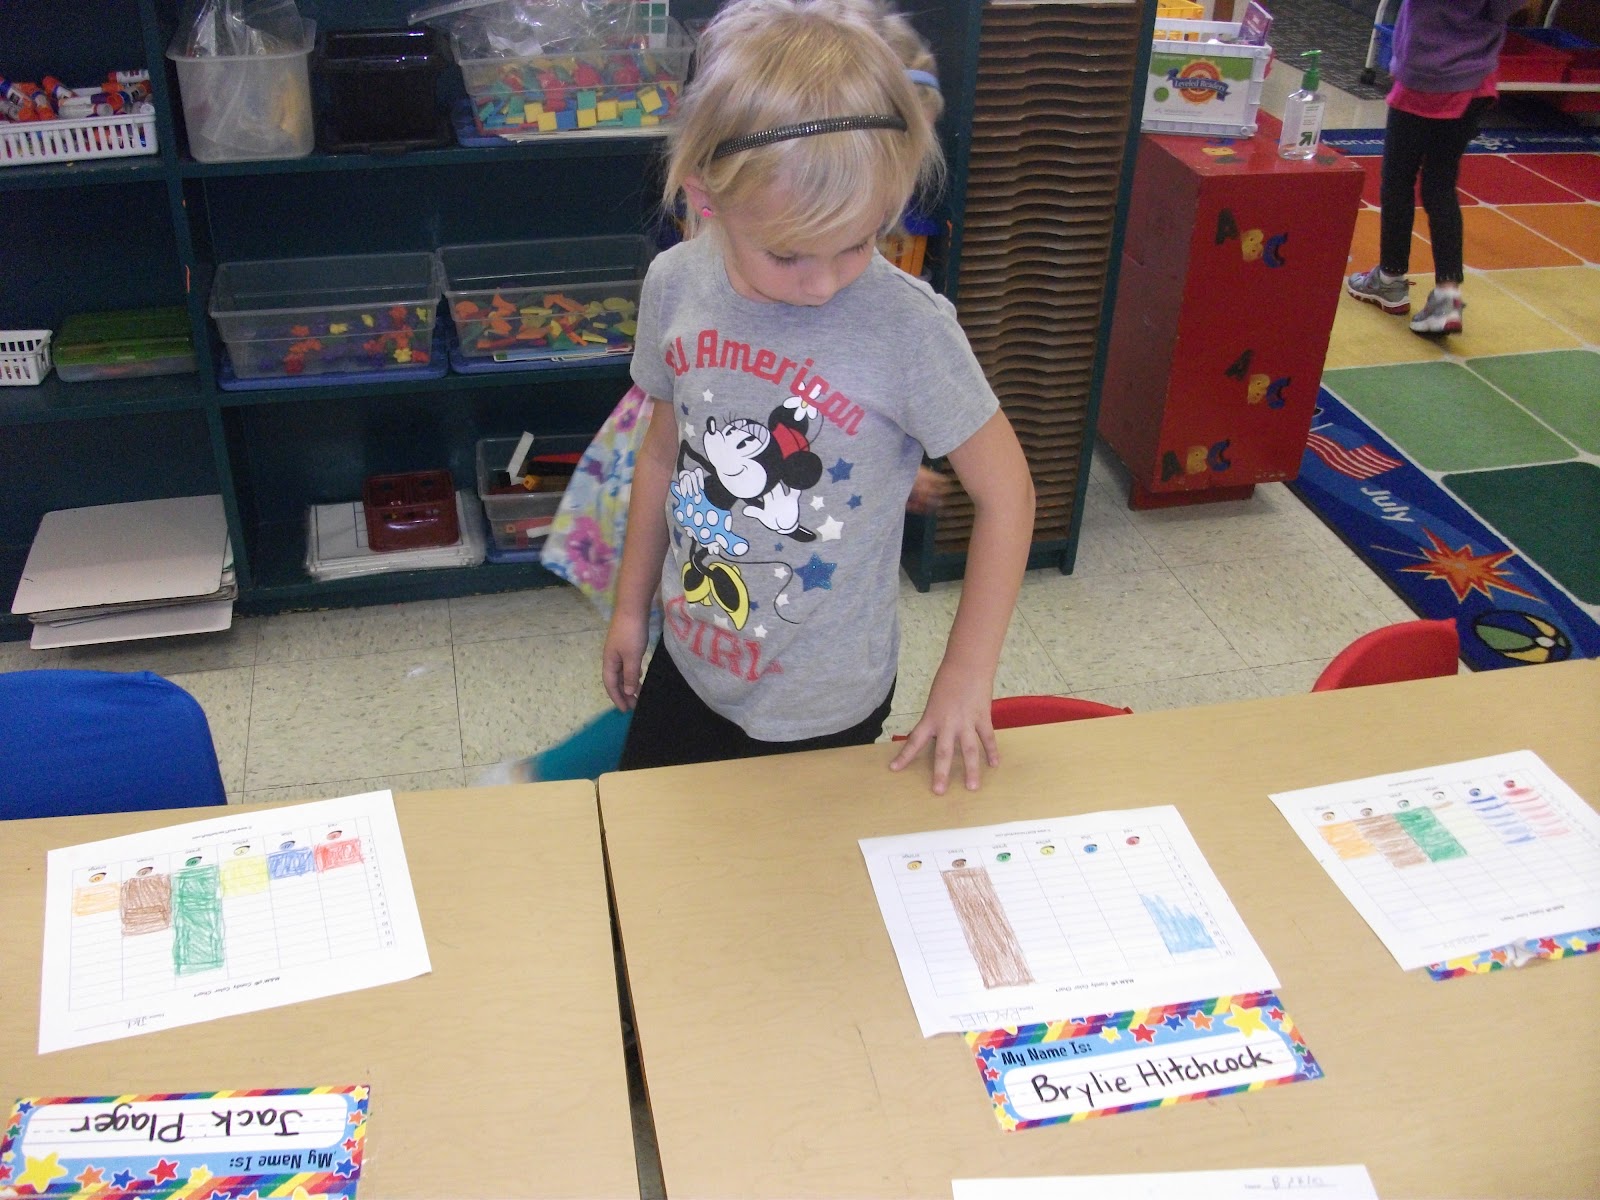
During our Colors of the Rainbow week, we graphed M & M'S. Students were given an M & M graph and to get prepared, they had to look at each candy on the bottom of the paper and color it the correct color.

Students then had to sort their M & M'S by color and place them in the appropriate place on their graphs. Next, they had to color in the correct number of bars on the graph that corresponded with the number of M & M'S for that color.


After everyone colored their graphs, we did a gallery walk. During a gallery walk, we walk around each table and look at our friends' work. Then we talk about things we noticed in other students' work. Some people noticed they had the same number of green M & M'S as other people, others noticed that one student had a four-way tie among four of his groups of M & M'S. After our discussion, we ate some of the M & M'S (not too many) and saved the rest for an art project.

Here are some students during our gallery walk.
We also learned about patterns this week and how there are different kids of patterns. Some patterns are called an AB pattern, and we also looked at AAB patterns. In math, we partnered up and made our own patterns out of unifix cubes. Our patterns were so interesting! Some groups made AB patterns. Others made AAB patterns, AAABBB patterns, or even ABC patterns!


The students noticed patterns in our classroom! Some people had patterns on their clothing.


Our carpet also had a pattern to it!

During reading workshop, we read a few books with color themes. We read "Mary Wore Her Red Dress" and "Who Said Red?" We noticed that authors use different themes in their stories. Sometimes authors write books about letters (like "Chicka Chicka Boom Boom") and other times they might right about numbers (like "Chicka Chicka 1, 2, 3"). This week we decided the books we read used colors as their theme. Knowing what the author's theme is can help us make predictions and understand the story.
During science, we had so much fun with our color projects and we learned a lot! One day, we filled two cups with water and added blue food coloring to one cup and yellow food coloring to the other. Then, we took two paper towels and place one in the blue water and the other in the yellow water. We took both clean ends of the paper towels and placed them in an empty cup.

The students made predictions about what they thought would happen. Here are some of the predictions they came up with:
- Nothing would happen.
- The blue water and yellow water would travel up the paper towels and stop at the top of the cups.
- Some of the blue water would travel into the empty cup and some of the yellow water would travel into the empty cup. They would form a blue layer of water and a yellow layer of water on top.
- Some of the water from the blue and yellow cups would mix in the empty cup and make green water.
- All of the blue water and all of the yellow water would travel into the empty cup to make green water. There would be too much water in the cup and it would "overflow like a volcano."
Each table had this experiment sitting on it. Throughout the course of the day, students could check their predictions as they worked at their table spots.

Over time, some of the blue and yellow water started traveling up the paper towels.

By the end of the day, our colors had combined and made green water in the middle cup! Luckily, it didn't overflow like a volcano onto the tables!

This week, we incorporated learning about solids, liquids, and gases into our Colors of the Rainbow theme. One day, we wondered if it was possible to make brand new crayons out of the ones we already had. We broke some of the extra, old crayons that were in the art supply area. We decided to use a crayon maker to help us with our experiment.

Students mixed dark and light colored crayons in the crayon maker. There is a light bulb in the crayon maker that heats up the metal part (which is where the crayon pieces sit). We made predictions about what would happen when the metal heated up. Lots of students thought the metal would get so hot, it would melt the solid crayons and turn them into liquid.


Our predictions were correct! The crayons melted.

Next, we poured the liquid crayons into the crayon mold and let it cool. Students thought the crayons would turn back into a solid when they were no longer hot. They were right again! We passed around the brand new crayons we made. Some students said the swirled colors of the crayons reminded them of the Earth or outer space.

Another project involved melting more crayons. We looked at crayons that had been hot glued to a canvas and thought about what would happen when a blow dryer was used on them.

Some students thought the crayons would get so hot, they would fall off of the canvas. Others thought the crayons would melt but stay on the canvas.

After just a few minutes, we could see that the crayons were melting. They were slowly turning from solid into liquid. They stayed on the canvas. Also, as the crayons melted and slid down the canvas, they started to mix and make new colors.
On Thursday, we mixed Kool Aid and water together and put the mixture in ice cube trays. The students predicted that once this mixture went into the freezer, it would become ice. Some thought it would take a couple of hours to freeze, some thought just a few minutes, some students thought it would take all night, and others thought it would take a couple of days to freeze. By the next morning, the liquid mixture turned into solid ice cubes. We would use these colorful ice cubes for our experiment on Friday.

Each student was given a small cup of Sprite. We discussed how the Sprite was liquid and there were lots of little bubbles in the Sprite; this was a gas. The gas bubbles stuck to the sides of the cup and they also traveled to the top of the Sprite. Next, we added our Kool Aid ice cubes one at a time. First, we started with the yellow ice cubes. The Sprite rose in the cups, but the color stayed the same.
Next we added our orange ice cubes and immediately, the Sprite started turning orange. The ice started melting and released some of its color. We continued to add the rest of the colors: green, red, and purple. We discovered that the Sprite rose in the cups every time a new ice cube was added. The solid ice cubes started to melt into liquid and release color into the Sprite. Soon, the colors started to mix.

We were able to drink our experiments and they tasted delicious!


No comments:
Post a Comment